Adrian: A Lava Planet with Curl Noise
Adrian is a small demo I made inside Detramotor to play with curl noise. Named after the planet Adrian from Project Hail Mary, a greenish gas giant. The original plan was to recreate that swirling atmospheric look, but I couldn't quite get there, so it ended up as more of a lava planet. This was my first crack at curl noise, so the implementation is more "looks about right" than mathematically rigorous, but I'm happy with it as a first version. I plan to do a proper gas giant version in a future post.
What is curl noise?
The idea behind curl noise is surprisingly simple. You start with a regular noise function (Perlin, simplex, value noise, whatever). That noise gives you a scalar field: for every point in space, you get a number. Now take the gradient of that field. The gradient points in the direction of steepest increase, which is useful but not what we want here. If you move particles along the gradient, they'd all converge toward the peaks or flow away from the valleys. Not very interesting.
The trick is to rotate that gradient 90 degrees. In 2D, that means if your gradient is (dx, dy), you use (dy, -dx) instead. This gives you a vector field that is divergence-free, which is a fancy way of saying the flow never converges or diverges. Particles following this field will swirl around in smooth streams without piling up or creating voids. It looks like fluid.
In math terms, for a 2D scalar noise field , the curl is:
That's literally it. Take the noise, compute the partial derivatives, swap and negate one. You get a vector field that naturally produces swirling, organic motion.
Try it
Here's a live 2D version of the curl noise advection. The UV grid starts as a regular grid and gets distorted over time by the curl field, then those distorted UVs are used to sample a lava-like color. Switch to "Flow Field" mode to see the raw curl vectors, or "Both" to see the flow overlaid on the lava. Crank up iterations to see stronger distortion per frame.
2D curl noise flow. The noise gradient is rotated 90 degrees to produce a divergence-free vector field. UV coordinates are advected through this field, then used to sample a procedural lava color. "Iterations" controls how many advection steps each texel takes per frame (matching ubo.iterations in the shader).
How the shader works
The implementation has two passes: a curl advection pass (fullscreen quad) and the actual planet rendering pass.
Pass 1: Curl advection
This runs as a fullscreen quad. Each pixel represents a UV coordinate that gets pushed around by the curl field. The output is a texture where each texel stores the new advected UV position.
void main() {
  vec2 position = texture(uParticleSrc, vUV).xy;

  for(uint i = 0; i < ubo.iterations; i++) {
    vec2 direction = texture(uNoise, position).xy;
    direction = vec2(direction.y, -direction.x);  // the curl rotation

    position += direction * ubo.dt * 0.1;
  }

  fUV = position;
}
The key line is vec2(direction.y, -direction.x). That's the 90 degree rotation that turns a noise gradient into a curl field. The shader samples the noise texture at the current position, rotates the result, and steps forward. It does this ubo.iterations times per frame, so you can control how much distortion accumulates each frame.
The uParticleSrc texture is the output from the previous frame (or the cleared identity UV from curl_clear), so the advection is cumulative. Over time, the UVs get more and more warped, creating those flowing lava streams.
Pass 2: Planet rendering
The second pass renders the actual sphere mesh. It takes the advected UV texture and uses it to look up colors from an albedo texture. This is where it gets aggressive with the color math:
vec3 getColor(vec2 uv) {
  vec3 color = texture(uAlbedo, texture(uPosition, vec2(1.0) - uv).xy).xyz;
  color = pow(color, vec3(8.0)) * 3.0;
  color += pow(texture(uAlbedo, uv).xyz * 0.4, vec3(5.0)) * 100.0;
  color = color * color;
  return color;
}
There's a lot happening in those four lines so let me break it down:
First it samples the albedo using the advected UVs (not the original mesh UVs). The
texture(uPosition, ...)call is the lookup into the curl-advected UV texture. Thevec2(1.0) - uvflip adds a mirror effect.Then it raises the color to the power of 8 and multiplies by 3. This is an extreme contrast curve that crushes everything dark and makes bright spots pop. Think of it as a "lava glow" filter.
It adds a second sample of the albedo at the original UVs, raised to the power of 5 and multiplied by 100. This creates a secondary hot layer that bleeds through the flow.
Finally it squares the whole thing (
color * color). At this point only the very brightest areas survive. Everything else is basically black.
The result is a surface where most of it is dark rock with bright cracks of molten lava flowing through it. The extreme power curves are doing all the work here. Without them you'd just see a blurry swirl of colors.
The fragment shader then tonemaps the result so the HDR values don't clip:
void main() {
  // ... same color computation ...
  fColor = vec4(tonemap(color, 10.0, 0), 1.0);
}
Voxel GI integration
One cool detail is that the vertex shader also writes into the engine's voxel GI system. It stores the lava emission color into a 3D voxel texture so the glowing lava actually illuminates nearby objects in the scene:
vec3 writeColor(vec3 color) {
  vec3 voxelPoint = world2volume(vPosition);
  ivec3 voxelIdx = ivec3(floor(voxelPoint));
  imageStore(voxelEmission, voxelIdx, vec4(color, 1.0));
  // ...
}
This is called from the vertex shader (not the fragment shader), which is a bit unusual. It means the voxelization happens at vertex granularity rather than per-pixel, which is coarser but cheaper. The lava planet basically becomes a glowing emissive light source in the scene for free.
The clear pass
There's also a curl_clear pass that just writes out the identity UV mapping:
void main() {
  fUV = vUV;
}
This resets the advection. Without it the UVs would keep accumulating distortion forever and eventually turn into noise soup. In practice you'd either reset periodically or mix the advected UVs back toward the original over time to keep things stable.
Why "Adrian"?
The name comes from the planet Adrian in the movie Project Hail Mary. Adrian is this greenish gas planet, and the original idea was to recreate that look with swirling atmospheric currents. I couldn't quite get there though, so what came out instead is more of a lava planet. Still looks cool, just not what I was aiming for.
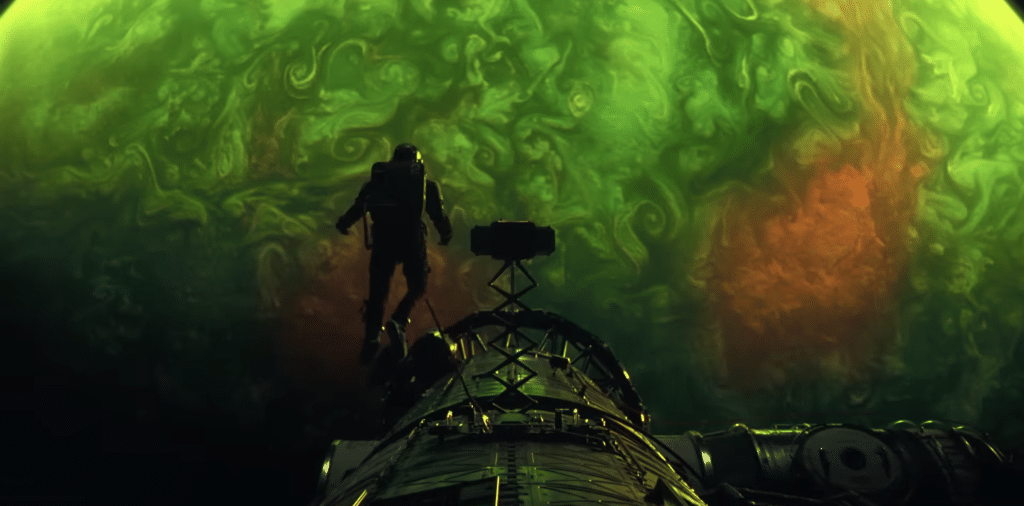
The actual Adrian from Project Hail Mary. Greenish gas giant. Mine turned out a bit more... on fire.
This was my first attempt at curl noise, so the implementation is more of a rough sketch than a polished system. The curl computation isn't technically correct (it rotates a sampled vector instead of computing derivatives of a scalar field), and the color math went in a completely different direction from what Adrian actually looks like. I plan to revisit this in a future post with a proper implementation that actually looks like a gas giant instead of a ball of magma.
Wrapping up
Curl noise is one of those techniques that gives you a lot of visual bang for very little code. The entire flow simulation is essentially one line (the 90 degree rotation), the rest is just plugging it into a render pipeline and making the colors look hot. If you want to try it yourself, start with any 2D noise, compute the gradient numerically (sample at x+eps and x-eps, divide by 2*eps), rotate 90 degrees, and advect some UVs through it. You'll have flowing lava in about 20 lines of shader code.